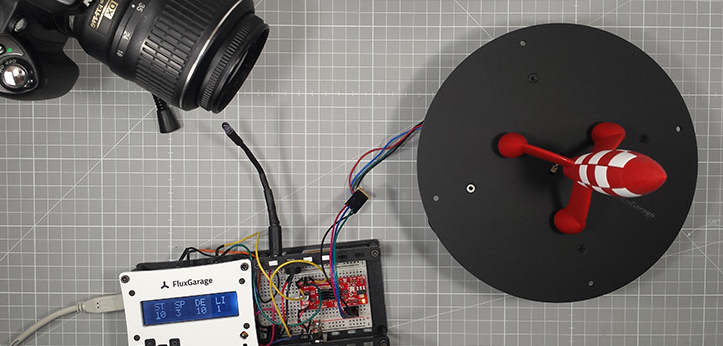
This is a step-by-step tutorial on how to connect a 16x2 LC-display with a 4-pin I2C module and PCF8574T chip to an Arduino or ESP32 board and output "Hello World!" as text on the display.
Step 1: Gather Materials
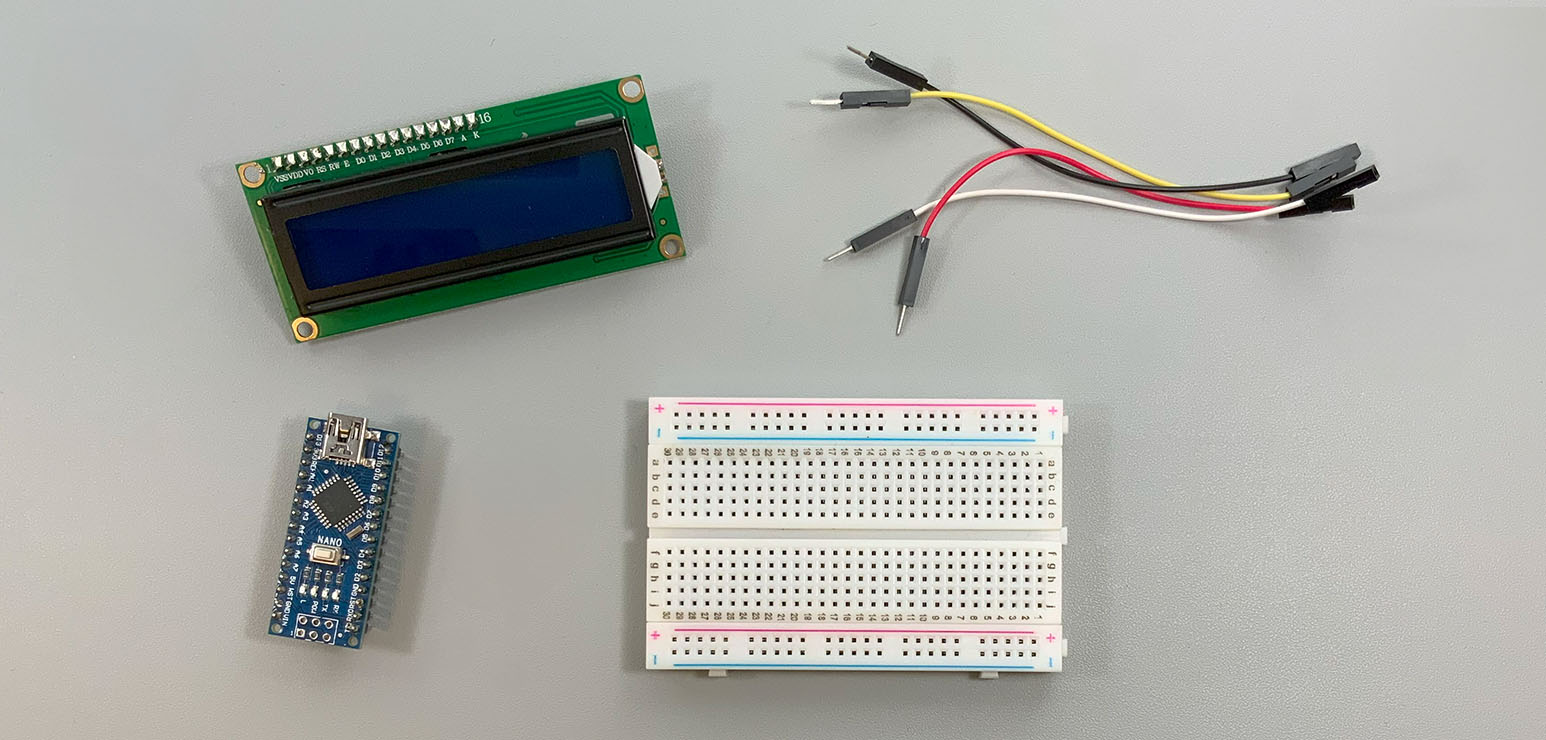
To connect the display, you will need the following materials:
- Arduino (such as Uno or Nano) or ESP32 board (such as ESP-WROOM-32)
- 16x2 LC-display with I2C module
(as used in the FluxGarage 16x2 LCD Frontplate DIY Kit) - Breadboard
- Jumper wires (4x female/male)
- USB cable to connect the Arduino or ESP32 to the computer
Step 2: Wire the Display
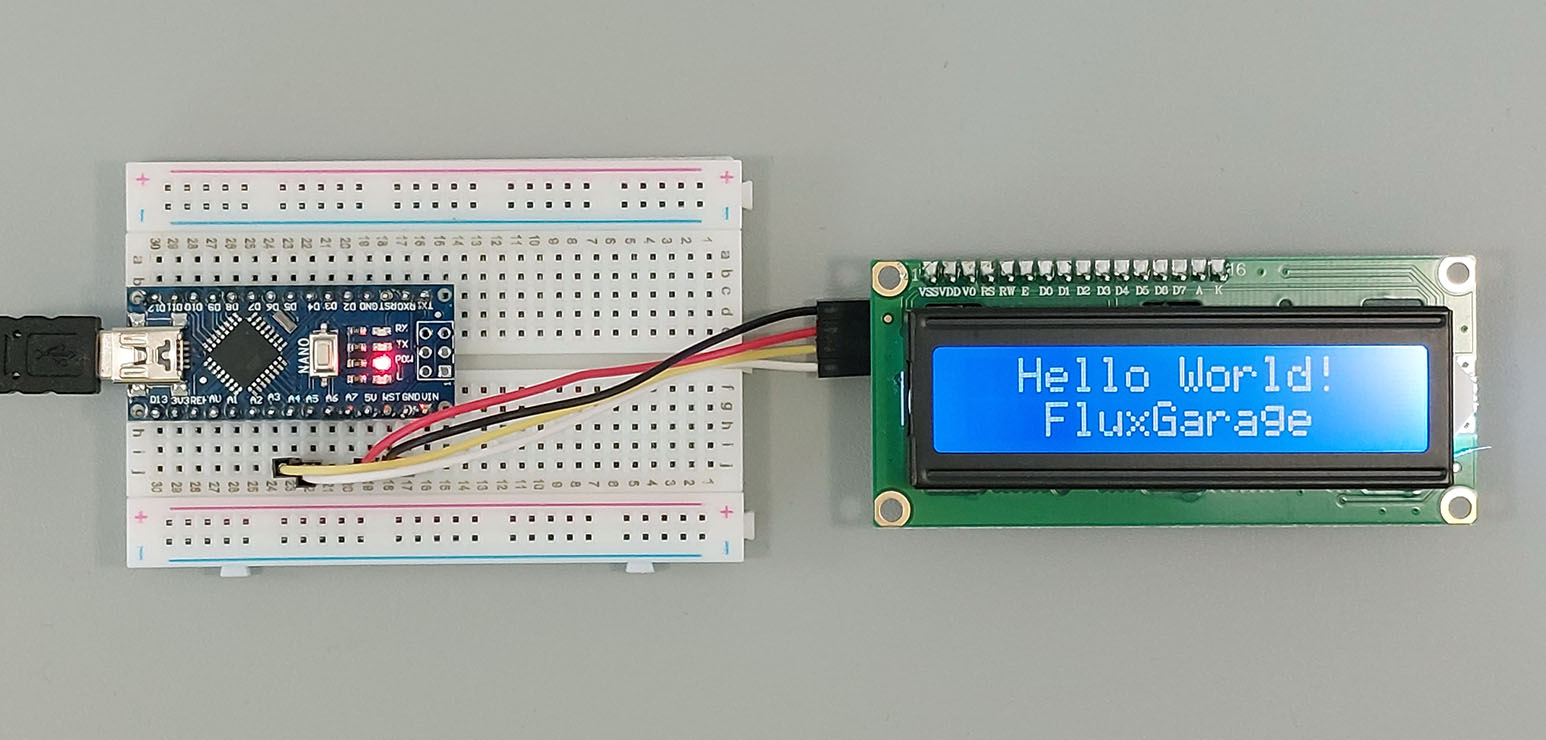
Connect the display to your specific microcontroller as follows:
| Display-Pin | Arduino-Pin | ESP32-Pin |
|---|---|---|
| VCC | 5V | 5V or VIN* |
| GND | GND | GND |
| SDA | A4 (SDA) | SDA (e.g. Pin 21)** |
| SCL | A5 (SCL) | SCL (e.g. Pin 22)** |
When using an ESP32 board:
* Please note that the LCD module needs 5V to work properly, especially when it comes to the brightness of the background LED.
Since the ESP32 is running at 3.3V, you'll have to power your board via the 5V USB connection or consider a separate 5V power supply for your LC-display.
** Also, the pin numbers for the ESP32 board (SDA and SCL) may vary depending on the specific board variant you are using. Make sure to consult the pinout diagram or documentation of your ESP32 board to identify the correct pins for I2C communication.
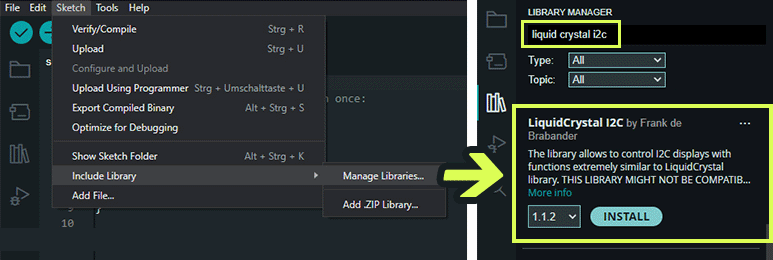
Step 3: Install Required Libraries
To drive the display, you will need the "LiquidCrystal_I2C" library from Frank de Brabander. You can install this library through the Arduino IDE's Library Manager by going to Sketch > Include Library > Manage Libraries and searching for "LiquidCrystal_I2C".
Step 4: Upload an Example Sketch
Copy/paste below's example code into your Arduino IDE. Then connect your Arduino/ESP32 to the computer and upload the program by clicking the Upload button in the Arduino IDE.
#include <Wire.h>
#include <LiquidCrystal_I2C.h>

LiquidCrystal_I2C lcd(0x27,16,2);  // set the LCD I2C address to 0x27 for a display with 16 characters and 2 lines

void setup()
{
  lcd.init();  // initialize the lcd
  // Print a message to the LCD
  lcd.backlight();  // turn lcd backlight on
  lcd.setCursor(2,0);  // set the cursor position to second character, first line
  lcd.print("Hello World!");  // print text
  lcd.setCursor(3,1);  // set the cursor position to third character, second line
  lcd.print("FluxGarage");  // print text
}

void loop()
{
}
Step 5: Adjust the Display's Contrast
After the upload is complete, the text "Hello World!" should appear on the display.
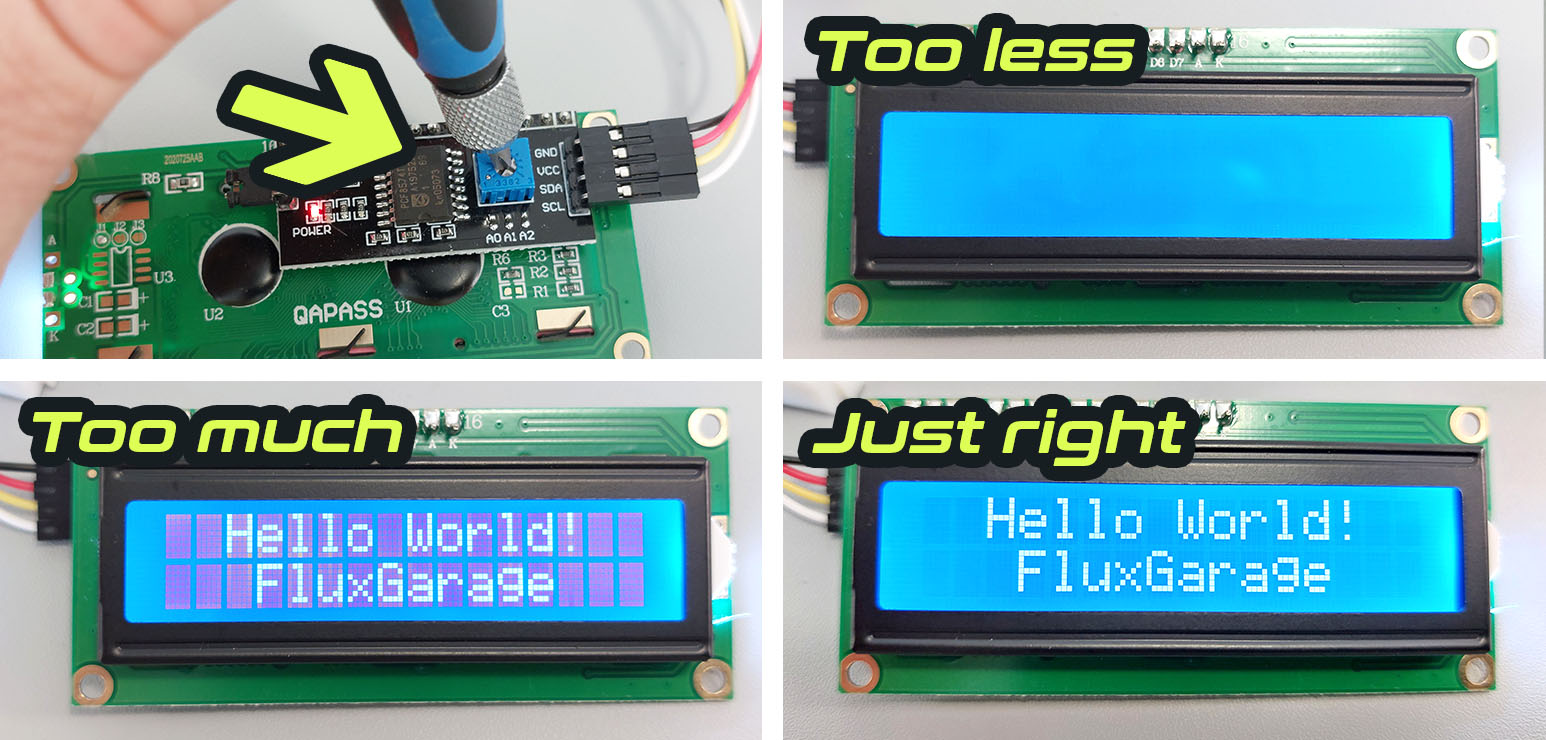
Sometimes you have to adjust the display's contrast by gently turning the poti on the backside of the module until you can see the text clearly.
That's it!